
On this page we will teach You how to use Team Viewer, and send access to Your PC so we could do the tuning.
In this tutorial we use Google Chrome browser - we recommend this browser.
You can also use other types of browsers, but the instructions for them would be a bit different (but very similar).
Also, installation procedure may vary from version to version, but general principles remain the same.
- You need to install Team Viewer program.
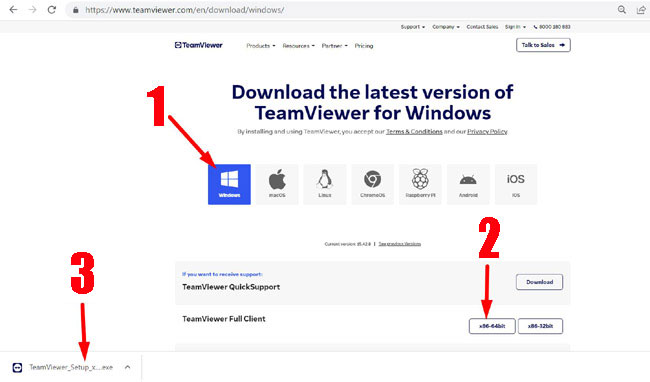
Make sure to remember NOT TO BUY ANY LICENSE - You just need a FREE ACCOUNT - Go to https://www.teamviewer.com/en/download/windows/
- Click on Windows(that's the only operating system we support for tuning - location is marked with number 1 arrow on photo below).
Then download TeamViewer Full Client x86-64bit(unless you have very old computer with 32bit CPU, then you select x86-32bit) - location is marked with number 2 arrow on photo below.
Once the download is finished, the setup file will appear in Your downloaded files, in Google Chrome it will appear in lower left angle of the screen (location is marked with number 3 arrow on photo below).
Click on the downloaded file to start installation process.
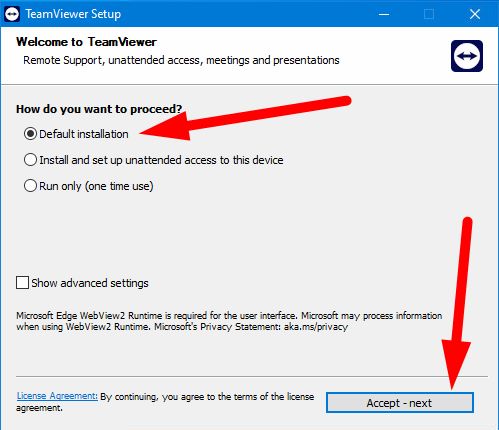
- Installation is pretty much standard as for any other program.
The first window should be like on photo below, set all the settings the same way as on photo below (Mark: Default Installation).
If it asks about usage type in any point of the process select Personal / Non-Commercial use.
Once You do that click on Accept - next
If You get a warning message from Windows, asking if You want to allow this program - click on YES.
- The Team Viewer will start automatically. If it didn't You will have a desktop icon to start it, should look like on photo below.
If it didn't start, please start it using the desktop icon (photo below).

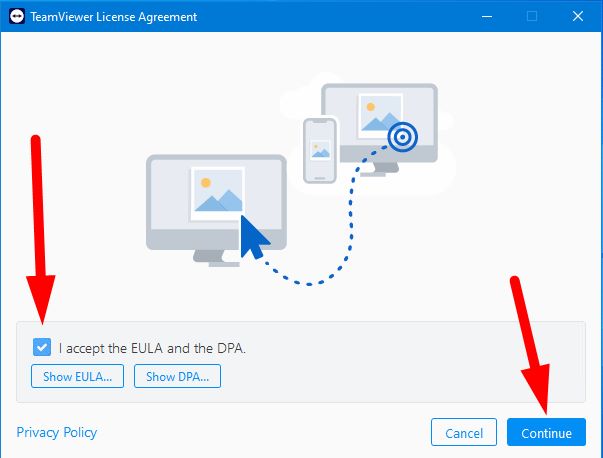
- It might ask You to confirm that You accept the license agreement(photo below)
Mark the I accept the... checkbox and click on Continue
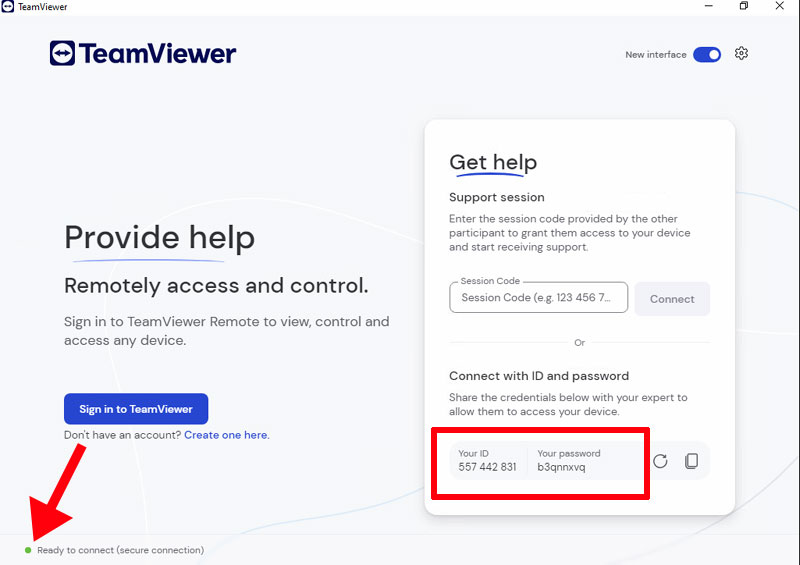
- Make sure that You have a working internet connection.
Most likley You will get the new interface that looks like the photo from below.
It will open You a window from photo below.
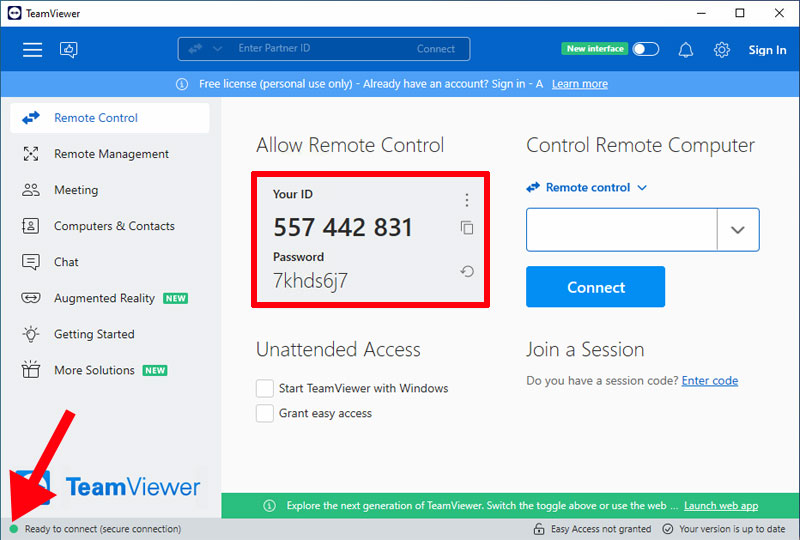
The Team Viewer should inform You that it is ready to connect (red arrow on photo below).
If the dot is RED, You have to check Your internet connection.
You need to send us your ID and your password (marked with a red square on photo below).
- If you switched to old interface, below is the example how the window will look.
The Team Viewer should inform You that it is ready to connect (red arrow on photo below).
If the dot is RED, You have to check Your internet connection.
You need to send us your ID and your password (marked with a red square on photo below).
CONTACT US ›